The Windows 10 Anniversary update gave a gift to developers in the form of the Windows Subsystem for Linux, or WSL as it will be referred to throughout this post. Starting with Ubuntu available first, there are now several flavors of Linux that can be installed on Windows 10 through the Windows Store.
Previously for my Laravel development on Windows, I used the Vagrant and Homestead, installed on VirtualBox. Over time this setup has grown more cumbersome, fault prone, slow, and overall just feels clunky with Linux now built into Windows.
I’ve been working with my WSL setup with Laravel with Valet for just under a month now, and things seem to be going very smoothly. I’ve also been doing Laravel development with VS Code for much longer than that, and have found some things to make that a better experience along the way as well. Here are the steps I took to get this up and running.
Important Note: If you have IIS or MySQL server running locally on Windows, you will need to stop those services to be able to run Valet/MySQL through WSL. You can navigate to the services console in Windows and disable the services for IIS and MySQL. I had both running on my machine before switching to WSL – If I need them again later, I’ll just re-enable those services. You will get hang-ups later in this process if either service is running, since the ports used by IIS webserver and MySQL will both be needed as part of our new setup.
Enable WSL
First we need to get the WSL up and running. Follow the steps in the Microsoft documentation here to get this going. I’m using Ubuntu for this guide. Once Ubuntu is set up, you need to run it to enter some initial configuration, including a root username and password. Complete this configuration and then you are ready to go.
Install PHP, Valet, and other Base Requirements
(Big thanks to Jack Whiting – some of these steps are taken from his excellent tutorial here.
This tutorial will use PHP 7.2, but you can feel free to use an older version of PHP if your requirements dictate that.
To install the packages we need, we need to add an additional package source first. Run the following command in Ubuntu:
sudo add-apt-repository ppa:ondrej/php
Then run the following to grab the latest updates (may take awhile):
sudo apt-get update && sudo apt-get upgrade
Now we are ready to grab the PHP packages we need to run Valet/Laravel (may take awhile):
sudo apt-get install php-fpm php-mysql php7.2-cli php7.2-curl php7.2-mbstring php7.2-xml php7.2-zip php7.2-intl curl git unzip php-cli
Grab these dependencies for Valet as well (may take awhile):
sudo apt-get install network-manager libnss3-tools jq xsel
Next, download/install Composer:
cd ~
curl -sS https://getcomposer.org/installer -o composer-setup.php
sudo php composer-setup.php –install-dir=/usr/local/bin –filename=composer
To use Valet under WSL, we need a specially tweaked version of Valet – https://github.com/valeryan/valet-wsl. Update the global composer file ~/.composer/composer.json and add the following:
{
“require”: {
“valeryan/valet-wsl”: “dev-master”
},
“repositories”: [
{
“type”: “vcs”,
“url”: “[email protected]:valeryan/valet-wsl.git”
}
]
}
Before running composer update, run “sudo chown -R $USER ~/.composer”, otherwise you will get a permissions error related to ownership of the .composer directory.
Now, run
composer global update
Add composers vendor bin to your ~/.bashrc file at the bottom:
export PATH=”$PATH:$HOME/.composer/vendor/bin”
Then source your .bashrc:
source ~/.bashrc
You’re finally ready for Valet now – run the following:
valet install
This will install Nginx for you as well.
Creating a Home for Your Sites
Your Windows drives are accessible through the /mnt/ directory in WSL. Inside that folder, you will see a folder representing each drive letter in Windows. Next, you should create a folder for all of your projects to live in. I created mine at C:/Users/myusername/code, which shows up in WSL under /mnt/c/Users/myusername/code
To avoid the pain of having to navigate to this folder every time you want to work with your code from WSL, you can make a symlink to that folder from your home folder by running:
cd ~ ln -s /mnt/c/Users/myusername/code
Now, you can just “cd code” from your home folder when you open WSL.
Finally, from your code folder, run “valet park” to allow Valet to read and hook up any directories within your code directory for use automatically.
DNS Configuration
By default, Valet is set up to use wildcard domains. This means, whatever you’ve named the folder containing the code for a site in the directory Valet is parked in – e.g. sitename, then sitename.test is the expected URL to reach that site. Unfortunately, windows does not support this out of the box through the built in hosts file, so we need to grab another tool – Acrylic DNS Proxy, available here: http://mayakron.altervista.org/wikibase/show.php?id=AcrylicHome.
After downloading and installing acrylic DNS, in the start menu under the Acrylic DNS proxy folder, run the “Start Acrylic Service” executable to start the Acrylic DNS service. You can run the “Stop Acrylic Service” executable at any time you need to in the future.
Now, modify Acrylic DNS’s hosts file. From the Acrylic folder in the start menu, run the “Edit Acrylic Hosts File” executable. This will open acrylic hosts file. Add the following to the bottom of it:
127.0.0.1 *.test
Lastly, we need to change our network adapter’s DNS settings to point to 127.0.0.1. You can do this under your network adapter settings, and select either your wifi or ethernet adapter, and update ipv4 adapters to 127.0.0.1 for primary DNS, and ipv6 to ::1 for primary DNS.
Now any requests to [anything].test will be routed to the appropriately named Valet folder site.
Note:
The Acrylic DNS settings don’t get along with some guest wifi setups. For instance, when working on my laptop in a coffee shop, I had to switch my DNS settings back to being detected automatically. Accessing Valet sites still works because it’s in the DNS cache, and I just put it back when I got home. A minor annoyance, and something to be aware of.
Test it out
Let’s test this out now to make sure it’s working.
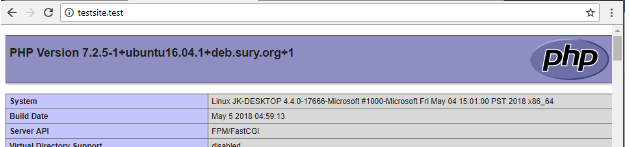
Create a folder in your code folder called testsite. Inside this folder, add an index.php file with the following:
<?php phpinfo();
Finally – Run sudo service nginx start to start up nginx. You will most likely be prompted to make a firewall exception for it by Windows.
Now if we try to access http://testsite.test from windows, we should get the PHP info page!
Troubleshooting
If you don’t see the phpinfo page come up, you may need to reboot for the acrylic DNS services to take affect. Once you’ve rebooted, after you open WSL/Ubuntu back up, you need to run
sudo service nginx start
And
valet start
Before you will be able to access the site.
If you are still having issues accessing the site, it may be due to multiple network adapters confusing the issue for Acrylic DNS. Ensure that you have pointed the correct adapter to 127.0.0.1 for primary DNS.
Initializing a Laravel Site
With our connectivity working, let’s create a site called “blog” with the basic Laravel template. Navigate to the code folder that was created in the steps above. Then, run the following:
composer create-project –prefer-dist laravel/laravel blog
Composer will create a “blog” folder with all the boilerplate for you. At this point, you should be able to go to your browser in windows and enter http://blog.test, and see the starter page:
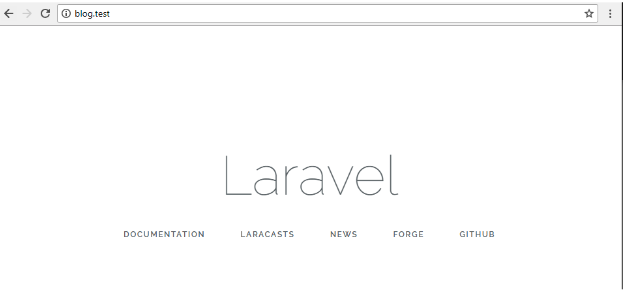
You should be up and running with basic Laravel development in WSL now!
Laravel Related Extras:
Setting up MySQL
I wanted to run everything needed for my Laravel dev stack inside of WSL, so I decided to set up MySQL server in Ubuntu.
To do this run:
sudo apt-get install mysql-server
Follow the setup prompts to set a root password. Once the installation finishes, stop the mysql service:
sudo service mysql stop
Then run the following to set up the home directory for the mysql user:
sudo usermod -d /var/lib/mysql/ mysql
Finally, run
sudo service mysql start
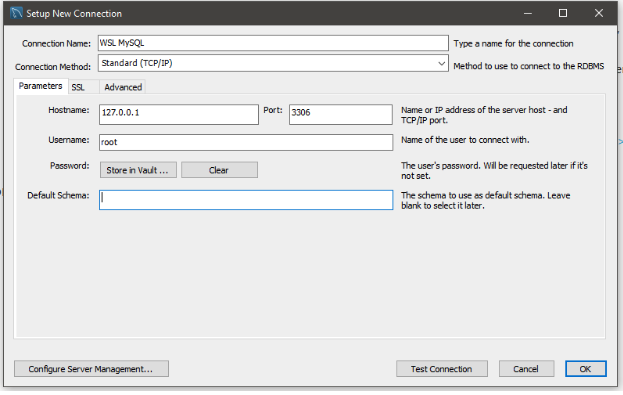
At this point you should be good to go. You can connect to and browse your MySQL database by using MySQL workbench on Windows – https://dev.mysql.com/downloads/workbench/ and connecting to 127.0.0.1 with the root account password you just set up.
Redis Cache
If you want to use queues/Laravel Horizon, you’ll need to set up Redis cache as well. To set this up, run:
sudo apt-get install redis-server
Once installed, start the redis service and you’re ready to go:
sudo service redis-server start
Install Xdebug
If you want to be able to debug from VS Code, you need to install xdebug. Run the following to do so:
sudo apt-get install php-xdebug
Running Unit Tests
If you want to run phpunit unit tests from WSL for your Laravel projects, you need to use the version of phpunit that comes installed with the Laravel project. For example, to run unit tests with the blog project we set up above, you would do the following:
cd ~/code/blog
./vendor/bin/phpunit
You should see the output of the hello world unit test that comes with the Laravel template:

Auto Start WSL Services
If you reboot your computer at any point, the WSL services that your Laravel dev will rely on won’t automatically start back up. To get around this, you can write a bash script to automatically start the services you need when you open WSL.
Under your home directory (cd ~), create the following script named start-services.sh:
#!/bin/bash
if ps ax | grep -v grep | grep ‘php-fpm’ > /dev/null
then
echo ‘FPM is running’
else
sudo service php7.2-fpm start
fiif ps ax | grep -v grep | grep ‘nginx’ > /dev/null
then
echo ‘Nginx is running’
else
sudo service nginx start
fiif ps ax | grep -v grep | grep ‘mysql’ > /dev/null
then
echo ‘MySQL is running’
else
sudo service mysql start
fi
if ps ax | grep -v grep | grep ‘redis-server’ > /dev/null
then
echo ‘Redis is running’
else
sudo service redis-server start
fi
Next, edit your ~/.bashrc file and add this to the bottom:
~/start-services.sh
Now if you close your WSL terminal and re-open it, you will be asked to enter your password and should see the services are running.
Visual Studio Code Configuration
Install PHP on Windows
For pretty much everything in VS Code to work right with PHP, you need to set up PHP on Windows and point VS Code to your PHP executable’s location so it can better PHP source code.
To do this:
- Download PHP (same version as you installed in WSL) from here: https://windows.php.net/download/
- Unzip the downloaded php files into a directory of your choice, e.g. c:Usersyourusernamephp
- Edit your VS Code settings and point the php.validate.executablePath setting to the path of the php.exe you just unzipped, e.g.:
- “php.validate.executablePath”: “C:/Users/yourusername/php/php.exe”
- Restart VS Code
Enable Better Laravel Autocomplete/Intellisense
Install the following two extensions in VS Code:
- PHP Intelephense – https://marketplace.visualstudio.com/items?itemName=bmewburn.vscode-intelephense-client
- PHP IntelliSense – https://marketplace.visualstudio.com/items?itemName=felixfbecker.php-intellisense
These two combined provide a decent overall autocomplete experience for php and Laravel in VS Code.
Any time you create a new database model, you can use Laravel ide helper to generate php documentation metadata for auto complete
- Execute this in your WSL environment in the folder for the Laravel project you are working with: “php artisan ide-helper:models”
- PHP Intelephense indexes code complete on startup, so you may want to close/reopen VS Code after you generate documentation metadata
- Additional reference: https://github.com/barryvdh/laravel-ide-helper)
Debugging
There are several steps to get debugging working between VS Code and your WSL environment. First, ensure you’ve installed xdebug in WSL (directions above). Then, Install the PHP Debug extension in VS Code.
Once that is ready, you need to set up a launch.json file within the project that you want to debug in to tell VS Code how to use remote xdebug. You can generate this file by clicking debug on the sidebar, then the settings icon by the start debugging button:
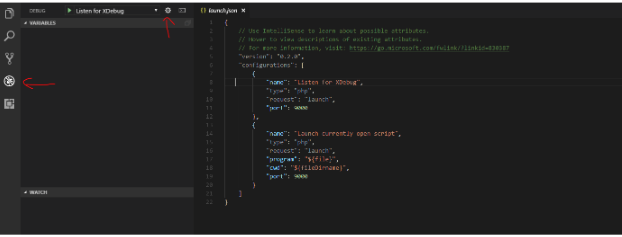
Modify the generated launch.json file to match the following:
{
“version”: “0.2.0”,
“configurations”: [
{
“name”: “Listen for XDebug”,
“type”: “php”,
“request”: “launch”,
“port”: 9001,
“pathMappings”: {
/mnt/c/Users/yourusername/code/blog”:”c:/path/to/your/code/blog”
}
},
{
“name”: “Launch currently open script”,
“type”: “php”,
“request”: “launch”,
“program”: “${file}”,
“cwd”: “${fileDirname}”,
“port”: 9001
}
]
}
Important note: note above that we don’t use the ~/code symlink we made earlier. You must use the full path to your code for this to work.
Next, within WSL, edit the xdebug configuration:
cd /etc/php/7.2/fpm/conf.d/
edit the “20-xdebug.ini” file and set the configuration to the following:
zend_extension=xdebug.so
xdebug.default_enable=1
xdebug.remote_enable=1
xdebug.remote_connect_back=1
xdebug.remote_port = 9001
xdebug.scream=0
xdebug.cli_color=1
xdebug.show_local_vars=1
xdebug.remote_autostart=1
Finally, restart the php service in WSL:
sudo service php7.2-fpm restart
You should be able to set breakpoints in your Laravel code now, run the debugger (you may get asked to make another firewall exception), and it will stop on those breakpoints.
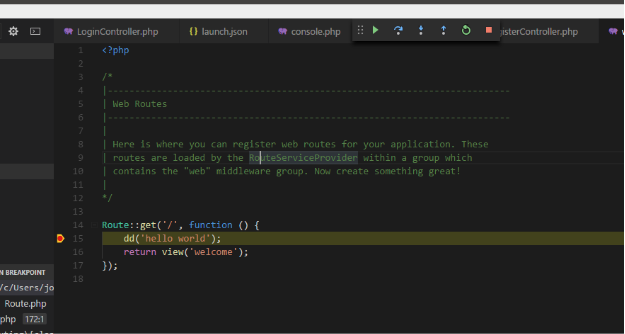
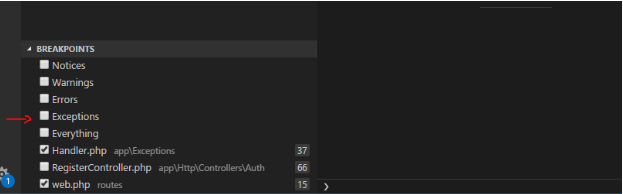
Note: You may want to uncheck the “everything” checkbox under the debugger menu’s selected breakpoints. It can sometimes stop in places you haven’t set breakpoints if this checkbox is checked:
Bonus: Extra WSL Goodies
Easier to read prompt color:
The default prompt color in WSL Ubuntu is green and dark blue. I think the green is ok, but against the black I think the dark blue is a little bit hard to read:
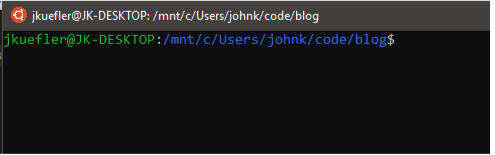
Thankfully, it’s very easy to customize this color. I made mine yellow. You can do this by editing your ~/.bashrc file, and updating the PS1= prompt under “if [ “$color_prompt” = yes ]; then” to something like this:
PS1=’${debian_chroot:+($debian_chroot)}[�33[01;32m]u@h[�33[00m]:[�33[01;33m]w[�33[00m]$ ‘
Which results in the following:
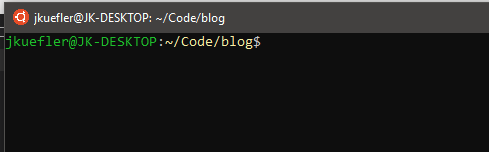
I found this quite a bit easier to look at all day!
Better Vim Theme
I use vim to edit files in WSL, but the default color scheme is pretty yucky – more blue on black:
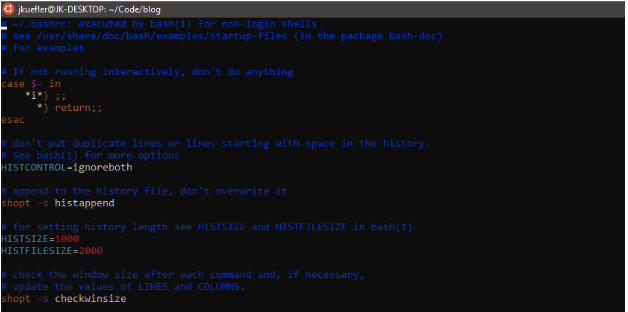
Thankfully, there is a beautiful vim theme available called gruvbox – https://github.com/morhetz/gruvbox that is a lot easier to work with! To get the new theme rolling, run the following:
cd ~/
mkdir .vim
cd .vim
mkdir colors
cd colors
curl -O https://raw.githubusercontent.com/morhetz/gruvbox/master/colors/gruvbox.vim
cd ~/
Edit the .vmrc file in the ~ directory and paste in the following:
set number
syntax enable
set background=dark
colorscheme gruvbox
set mouse=aif &term =~ ‘256color’
” disable Background Color Erase (BCE) so that color schemes
” render properly when inside 256-color tmux and GNU screen.
” see also http://snk.tuxfamily.org/log/vim-256color-bce.html
set t_ut=
endif
Now when you edit files with vim, it will look like this:
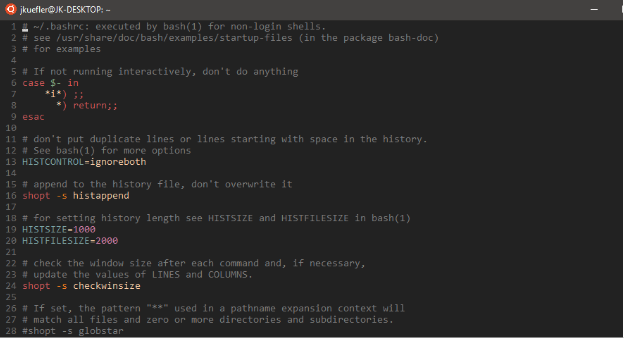
Much better! Big thanks to Scott Hanselman’s great post about making WSL for Linux an awesome place for development for turning me onto this theme: view link
I hope this helps you start to use WSL for your Laravel development with VS Code! So far after quite a bit of trial and error, and different setups, I’ve found this to be the best way to do Laravel development on Windows.