Why Vue and Razor Pages
As someone coming from the ASP.Net backend world, I’ve slowly been learning to work with front end frameworks. Our front end framework of choice is Vue, and I think it’s very well structured, especially for beginners. We’ve done SPAs (Single Page Applications) using Vue for the front-end, and ASP.Net Core 2+ for the backend. When we’re not making a SPA, we typically use Razor Pages. Sometimes though, we have just a page or two that needs to be more interactive, that needs to have that “SPA feel”. Thankfully for sites like that, you can integrate Vue with Razor pages in about 10 minutes to get the best of both worlds. One nice thing about doing this is you don’t need to use a state manager like Vuex or Redux, we can just use the ASP.Net Core razor page backend to manage our state.
Project Scaffold
I’ll be using ASP.Net Core 2.2 for this example, but it should also work with ASP.Net Core 3+ as well. I’m going to start from scratch using VS Code. These steps should be platform independent – you can do it on Windows, Mac OS, or Linux, you just need to make sure to have the latest version of .Net Core installed.
First, make a folder and run the following in your terminal of choice:
dotnet new webapp This creates a new ASP.Net Core web app with razor pages
When you open the folder in VS Code – it will pop up and ask you if you want to add the required assets needed to view and debug the app – say yes. This will allow you to just run the app from the VS Code debugger if you need to debug.
Now, you can type “dotnet run” or launch from the debugger to run the app, just to make sure things worked. You should be able to browse to the address and port listed in your terminal (probably https://localhost:5001) and see the starter template:
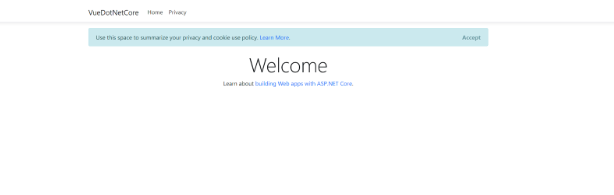
You can accept the placeholder cookie policy, so we don’t see it again, or remove it from the layout if desired.
Now, let’s add a razor page called “Counter” using the CLI. In your terminal, inside the folder our code was generated in:
cd Pages
dotnet new page -n Counter
This will add a blank razor page inside the pages folder in the app called Counter.
Now if you run the app and browse to /counter, you should see a blank page, ready to go. We’ll add a counter component to this page and make use of the backend portion of the razor page to keep track of state.
Vue Setup
We’re going to pull Vue in from a CDN. It would be better to install it with something like NPM, but I wanted to create a clear and concise example here with everything in one place, so for simplicity I’ll just do it this way at the top of the Counter page:
<script src=”https://unpkg.com/vue/dist/vue.js“></script>
If I was going to do this on multiple pages, I’d want it in the <head> tag of my layout file instead.
Now below the script tag, lets go ahead and build a super simple vue counter on the page. Each time you click the “Increment Count!” button, the counter will increase:
<div id='app'>
    <div>
        <h1>Count is: {{ count }}</h1>
        <br>
        <p>
            <button v-on:click="count++">Increment Count!</button>
        </p>
        <br>
    </div>
</div>

<script>
    var vueApp = new Vue({
        el: '#app',
        data: {
            count: 0
        }
    })
</script>
It looks like this when we run and go to /counter
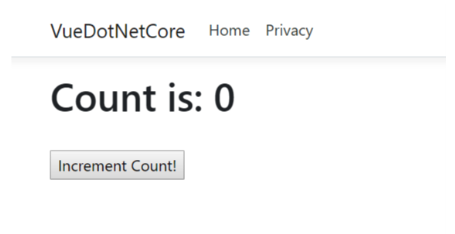
Each time you click the button, the count goes up. Amazing!
State Management
Oftentimes, we want to manage the state of components through something like Vuex or Redux. I think those are great tools, especially for SPAs. However, in a situation like this where we have a component scattered around here or there, it might just be easier to use one of the options for state that’s baked into the razor pages backend, so let’s try that.
I’m going to make it so that our counter value is remembered whenever the page is refreshed/navigated to. First, I’m going to initialize a Count property in the page model in the code behind of the razor page:
public class CounterModel : PageModel
{
    public int Count { get;set; }

    public void OnGet()
    {
    }
}
Then, in the OnGet() function, I’m going to set that property from the current user’s session state:
public void OnGet()
{
   int? tempCount = HttpContext.Session.GetInt32("SessionCount");

   if (tempCount != null)
   {
       Count = tempCount.Value;
   }
   else
   {
       Count = 0;
   }
}
Note – add using Microsoft.AspNetCore.Http; at the top of your page to be able to utilize Session.GetInt32 extension method.
Other Note – your app must have sessions enabled to be able to do this. To enable session state, in your app’s Startup.cs ConfigureServices method, add:
services.AddDistributedMemoryCache();

services.AddSession(options =>
{
    options.IdleTimeout = TimeSpan.FromMinutes(20);
    options.Cookie.HttpOnly = true;
});
And in the Configure method:
app.UseSession();More info on enabling session state can be found here: https://docs.microsoft.com/en-us/aspnet/core/fundamentals/app-state?view=aspnetcore-2.2
Now, we have a way to load the value of the counter when the page first loads, but we also need a way to set the value of the counter to the session each time the button is clicked. Let’s add an “OnPost” method to our page model:
[HttpPost]
public void OnPost(int counter)
{
    this.Count = counter;
    HttpContext.Session.SetInt32("SessionCount", this.Count);
}
Now, we can make a few updates to our vue component to use these new capabilities. Here is the full updated page and I’ll explain what’s new:
@page
@model MyApp.Namespace.CounterModel

<script src="https://unpkg.com/vue/dist/vue.js"></script>
<script src="https://unpkg.com/[email protected]/dist/axios.min.js"></script>

<div id='app'>
    @Html.AntiForgeryToken()
    <div>
        <h1>Count is: {{ count }}</h1>
        <br>
        <p>
          <button v-on:click="incrementCount">Increment Count!</button>
        </p>
        <br>
    </div>
</div>

<script>

    var vueApp = new Vue({
        el: '#app',
        data: {
            count: @Model.Count
        },
        methods: {
            incrementCount: function() {
               this.count++;

               var headers = {
                "RequestVerificationToken": $('input:hidden[name="__RequestVerificationToken"]').val()
                }

               axios.post('/counter?counter='+this.count, null, {headers: headers});
            },
        }
    })
</script>
First, I want to use a library called axios to post data, so I added a new script tag at the top to pull that in from a CDN. Once again, it would be a good idea to put this in my layout if I planned to use it throughout my web app, and pull it in locally via NPM.
Next, I added @Html.AntiForgeryToken() to the top of my component. This includes a hidden input tag with an antiforgery token in the value. Whenever we post data, with razor pages, we need to include the value of this antiforgery token to prevent CSRF attacks.
When I initialize the count now in the component, I set it to @Model.Count, which will ensure it is set to the value retrieved from the session in the page model, rather than 0.
I also changed my button click to call a new “incrementCount” function. In this function, I’m doing a couple of things after incrementing the count:
- First, I set up an object containing the CSRF token value from the page to be included in the header on the post.
- Then, I use axios to post the new count to the OnPost method on the page backend to update the session.
- Note that I’m doing this with a query string param, I could use an object/viewmodel as well if there were more attributes or I wanted to do validation more easily with data annotations/etc.
That’s it! Now when I run the web app and navigate to the /counter page, I can increment the counter, refresh the page or navigate away/back and it sticks.
If you need to manipulate more data through your vue component, you can certainly add more handlers to do specific things with your razor page backend, much like you’d add more methods to handle state in Axios/Redux etc. You could also use store and retrieve data in a database, redis cache, cookie, etc. More on Razor page handlers here: https://www.learnrazorpages.com/razor-pages/handler-methods
I hope this helps you to get started with your next project using ASP.Net Core razor pages and vue! You can find this code on GitHub here: https://github.com/johnkuefler/VueRazorPagesSample